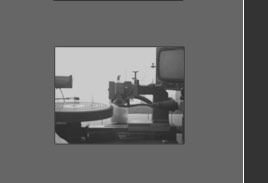
The Vinyl Manufacturing Process: Mastering - Master Cut - Pressing - Artwork Making vinyl records is hard. Most people are familiar with the process of copying or 'burning' a CD where you stick the master in, press a button and hey presto an exact copy is ready in minutes. Making vinyl records is NOTHING like that. It is a totally analogue process through the entire chain, from your master recording to the end product that goes to stores and dj's, which requires knowledge and experience at every step to ensure that what comes out the other side of the process resembles what gets put in. Here's an explanation why and a few tips to help you get the best results from your vinyl records. Mastering Mastering is really the last step in the recording process, where your final mixes get an overall 'tweak' by someone with 'golden ears' using specialist processing (equalization, dynamic and spacial processing) to achieve a durable sound that will sound good on lots of different sound systems. Mastering music that is intended for vinyl however requires some special attention to the phase relationship of the lower frequencies and sometimes the dynamic and eq characteristics, depending on the vinyl record cutting process to be used. It is highly recommended you get your music for your vinyl record mastered by someone who has done mastering for vinyl before and knows that there is a difference between mastering for cd and vinyl, otherwise you will not get the most out of your record, or worse still, it may be barely playable. Your final master (also called a production master, meaning it is EXACTLY what gets put into production/manufacture) needs to have the music compiled EXACTLY how you want it to go on the record and clearly labeled as SIDE A and SIDE B with the track labeled (preferably with times to assist the cutting engineer). This is because during the cut, the engineer presses PLAY on the master and lowers the cutting head into the groove and does not stop until the end of each side. Master Cut The first stage of making vinyl records is to cut your master platter. There are 2 systems for doing this, either to a lacquer or metal platter (Direct Metal Master - DMM). The cutting lathe has 2 magnetic coils at 90 degrees to each other, which are driven electrically by the left and right signal of your record master. The music signal (waveform) is then directly cut into the surface of the rotating platter. The cutting engineer has the very tricky job of interpreting the music content into groove depth, width and making sure that the resulting cut is as loud as possible but fits on the space of the record. Because this is an analogue process it means the louder you want it, the bigger the grooves, the bigger the grooves the more space they take up, the more space they take up, the less recording time you have on a record. So, think of a blank platter as a fixed amount of currency, you have to play off quality vs quantity, so an 8 minute per side 12" is able to be many times louder than a 30 minute 12". Here is a guide for maximum plating times of vinyl records: revolutions per minute/ diameter (inches) 33 RPM 45 RPM 7" 7 - 7.5 min. 5 - 5.5 min. 10" 10 - 12 min. 8 - 10 min. 12" 12 - 15 min. 10 - 12 min. It is STRONGLY recommended that these times are not exceeded if you are after modern LOUD levels because every minute over these times will force the cutting engineer to drop the level of the entire side of the record to fit it in. I hear you ask 'but in the 70Õs and 80Õs some compilations had up to 30 minutes per side?' The answer is YES they did and the sound quality and level of those cuts would be considered unacceptable by contemporary standards, this was only done because going to a second disc was too expensive for some albums. Pressing If you have done a lacquer master cut the next step is the metal processing, where the metal plate or 'father' is made (positive groove or ridges). From this the "mother" is made (a metal alloy copy of the record) from which 'stampers' (metal stamping plates with ridges) are made and loaded into the pressing machines. The stampers last for about 2000 units of vinyl ea so for large runs, several stampers are made from the mother to preserve the integrity of the grooves in the final manufactured record. The production records are made with a pancake of vinyl (about 1cm thick and the size of a record label) that has the record label either side of it being loaded into the press (with a top and bottom stamper in it) and squished to form the shape of the grooves of the record and then the edges are trimmed and packed. With a DMM master cut, you are cutting the copper mother directly so you eliminate 2 transfer processes and retain better transient, high frequency content and dynamic characteristics (lower surface noise). A test pressing is the first run from the freshly made pair of stampers and is HIGHLY recommended to do, to check that the sound quality of the cut is what you want. Once the test pressings are approved the full run of the pressing takes place. The final pressing can be done in a variety of vinyl weights (for 12" 140g, 180g and 220g) which designates what size pancake gets loaded into the presses and resulting thickness of your vinyl records. Artwork You can choose to have any design label and jacket even a picture disc or coloured vinyl if you like. There are templates to give you the size guide and a spec sheet to advise what format to provide finished artwork in. This should be considered at the time of requesting a quote because the artwork printing often makes the biggest variation in pricing for the production of vinyl records.